Vremi Silicone Baking Cups and 3-in-1 Apple Slicer Review & Giveaway!

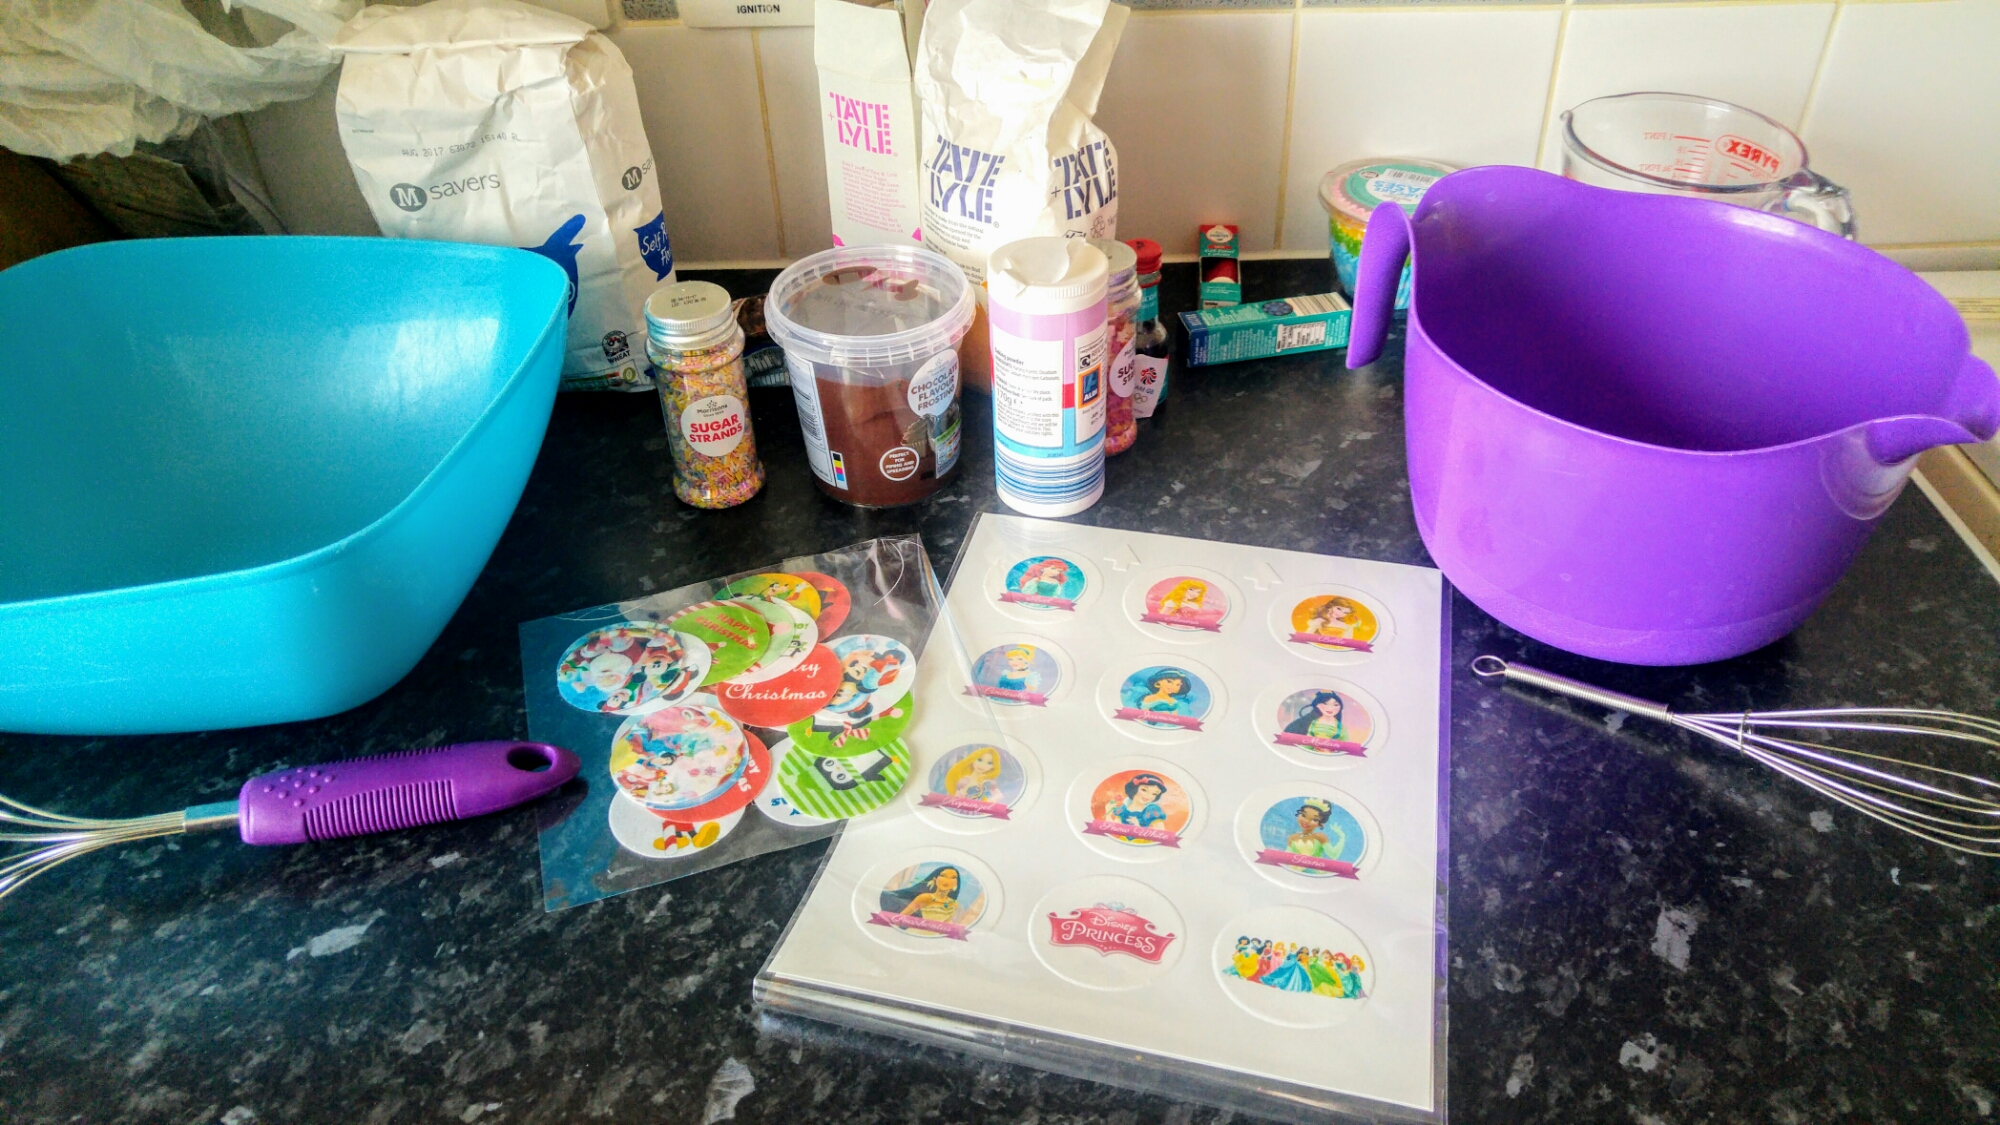
We were sent some Vremi Silicone Baking Cups and an Apple Slicer to review, we love food and baking so we couldn’t wait to check them out. Anyone who has been keeping up with my recent tweets will know since replacing my cooker I have gone on a baking binge. The girls and I love to bake and decided to put the baking cups to the test first!

Vremi Silicone Baking Cups

Vremi Baking Cups

The Vremi silicone baking cups are £13.99 for a pack of 24 Multi-coloured & BPA Free Round Cake Moulds for Cupcakes and Muffins. The baking cups are bright and colourful in pink, yellow, green and blue. The baking cups are non-stick as well as BPA free. They are oven and freezer safe and much to my delight dishwasher safe too!

Butterfly Muffins

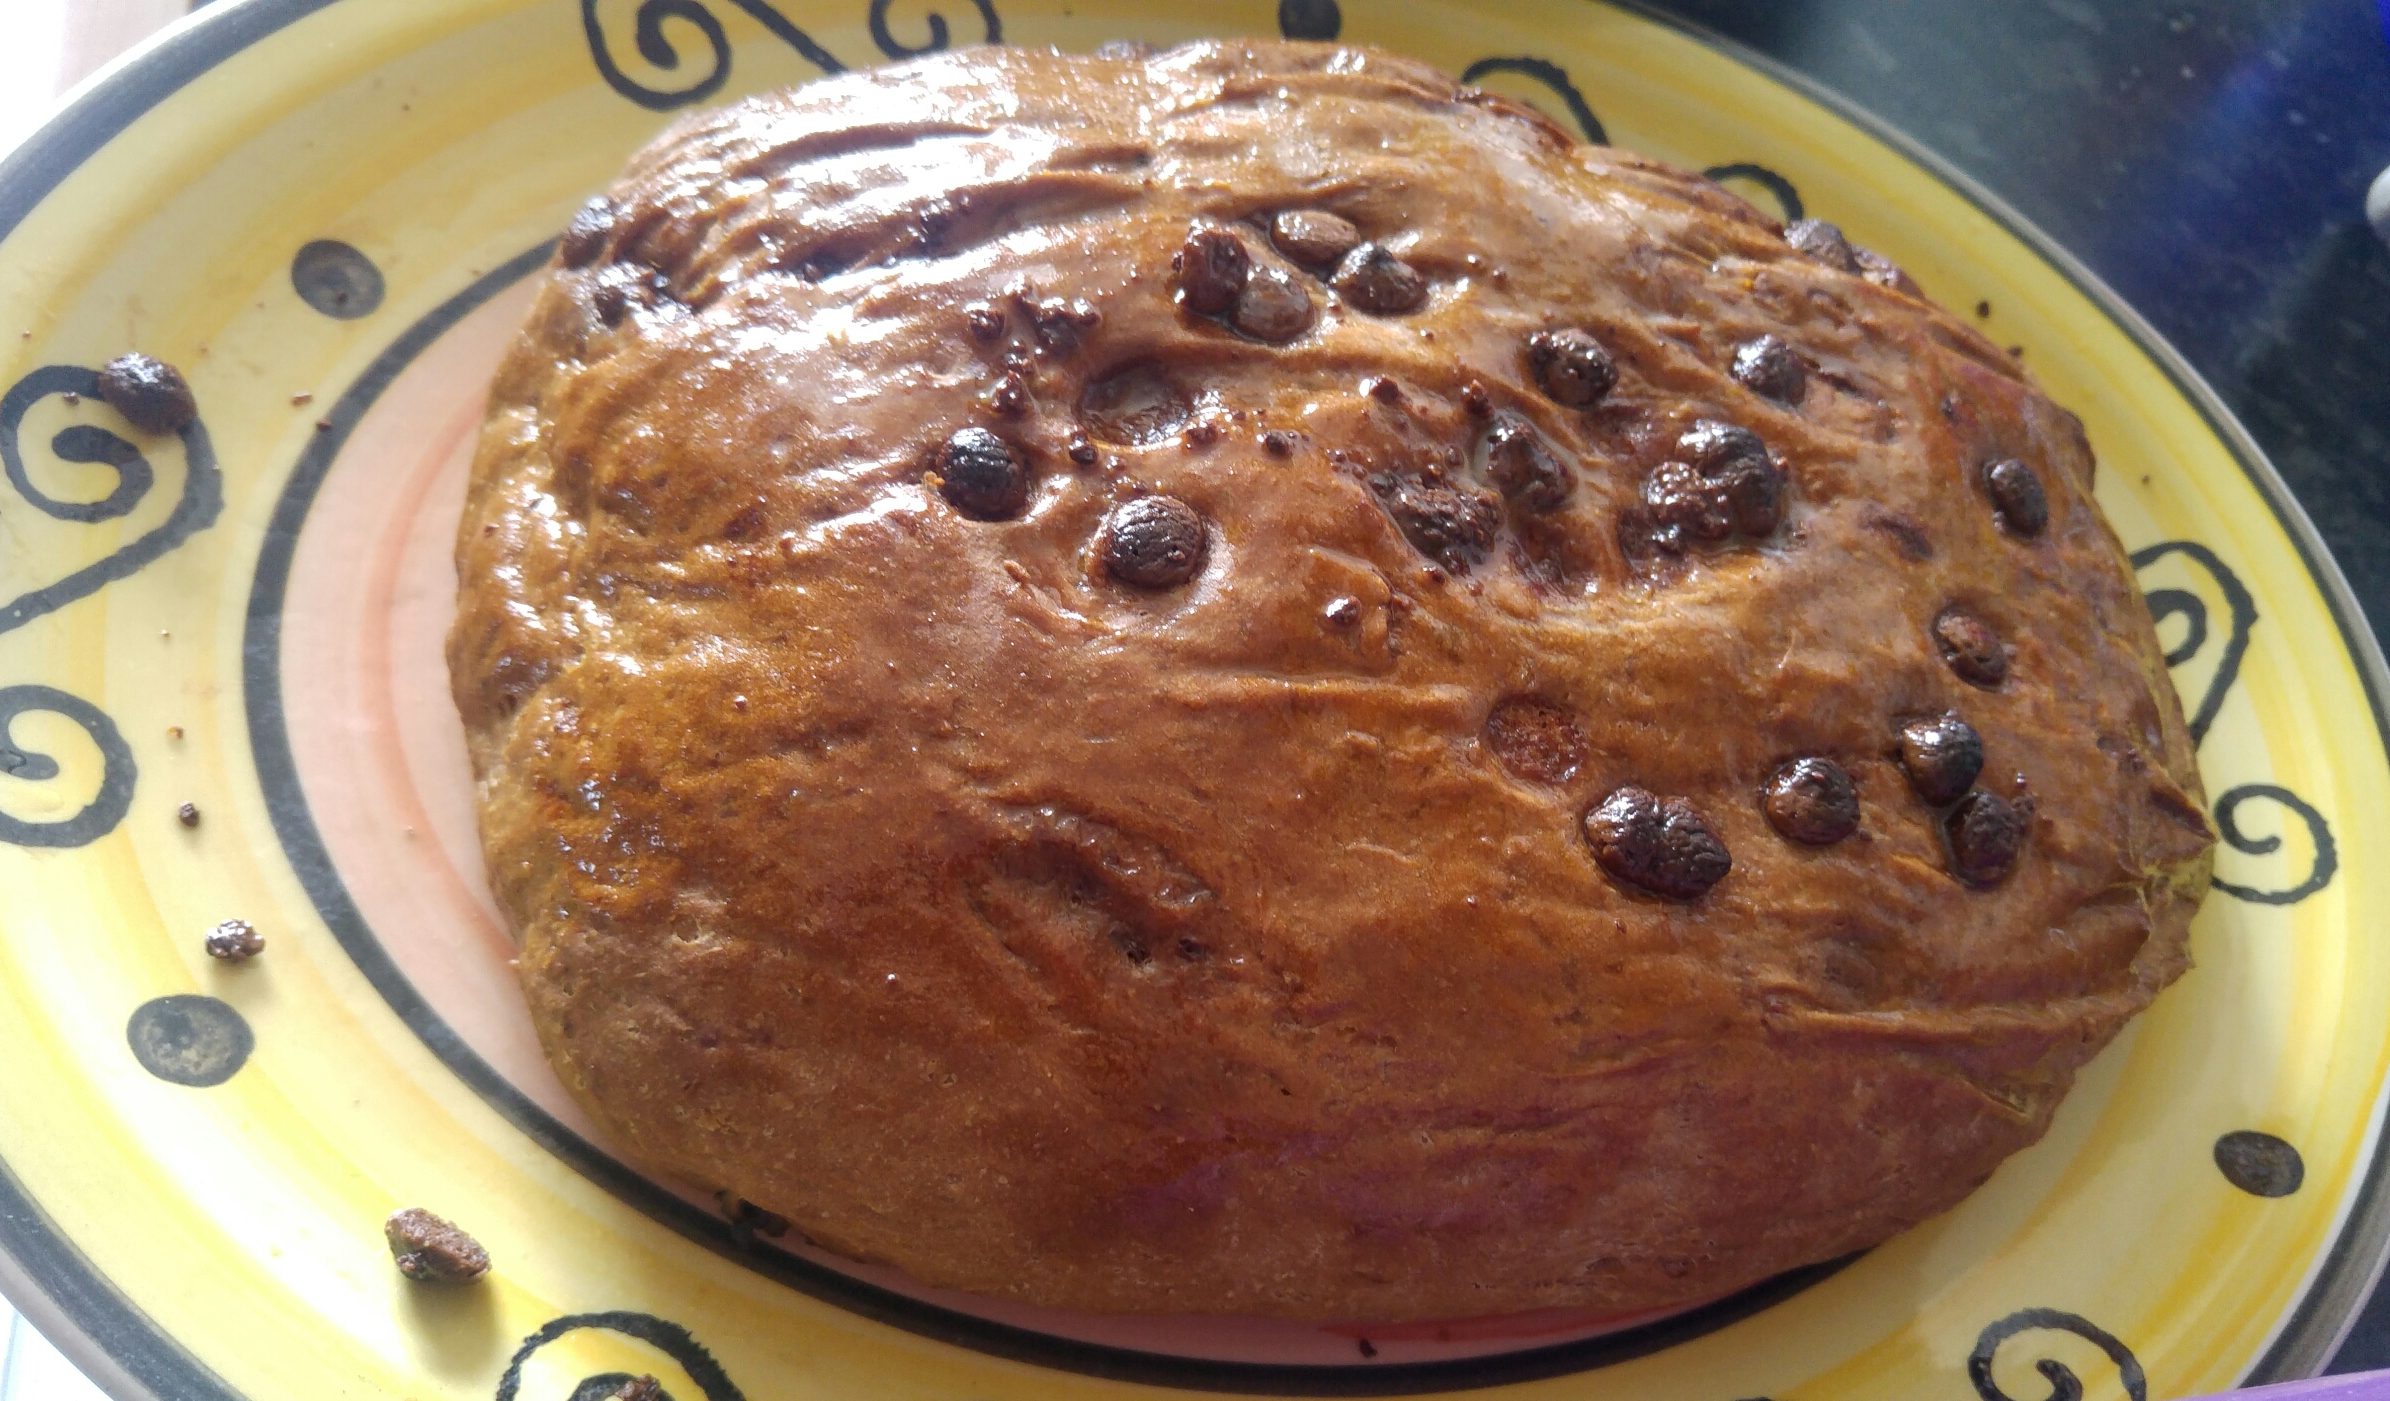
Ok so my butterfly muffins may not look that amazing but the fact they came out of the baking cups so easily really is! We’ve had similar ones before that have been tricky to remove the cake/muffin from. The Vremi ones I had no issue with at all and would definitely recommend them for anyone who loves to bake. The came out of the dishwasher spotless and will no doubt get plenty of use.

Vremi 3-in-1 Apple Slicer

Vremi 3-in-1 apple slicer

The Vremi 3-in-1 Apple Slicer is £7.99 on Amazon and comes with 3 attachments for apples, potatoes and mangos. The blades are interchangeable and so easy to change. Apple slicing blades cut an apple into 8 wedges, perfect for my girls snacks. The potato slicer is great for homemade French fries and cuts 36 of them! If you love mangos then the mango corer is perfect as it removes the seed and slices the fruit.

apple sliced

I love how easy the slicer is to use with lovely big soft grip handles meaning the girls can help. The blades are so much sharper than my previous apple slicer and slice straight through! I’ve binned my previous apple slicer (even though it was purple!) because the Vremi one is much easier to use.

If you love the sound of these fab Vremi products then enter the Gleam competition below for a chance to win both!

Win the Vremi Silicone Baking Cups and Apple Slicer #4

Baking Fun Using My Cupcake Toppers

The girls had some baking fun yesterday making cakes after I was given a £15 off code to try out some of the Toppers from MyCupcakeToppers in exchange for a review of them.


After looking through MyCupcakeToppers site I picked out some lovely Minnie Mouse & Disney Prince Real Icing toppers (12 for £6) that I knew the girls would love.


For our Minnie Mouse & Disney Princess cakes the girls made a mix for 12 chocolate chip cakes each. They quickly got their mixes made up, poured into the cases and into the oven.. so they could lick the bowls of course!

We loved the cakes and all helped ourselves to a few since we made 24 in total. The real icing cupcake toppers were amazingly yummy, even the Mr who isn’t keen on cake toppers really enjoyed it and munched through quite a few cakes!

The real icing toppers are absolutely brilliant and the printing is amazingly clear, they make the girls messy (but tasty) cakes look lovely.

I will definitely be ordering again in future for special occasions. I love how many design choices were available on the site. If you can’t find a design you like you can upload your own images or fill out a form with details of what you would like and the in-house design team can see what they can do for you too!

Want to make some too? Check out our recipe below.

You will need:

110g(ish) Caster Sugar

110g(ish) Butter

2 eggs

110g(ish) Self-raising flour

1tsp(ish) Vanilla extract/flavouring 

2ish handfuls of milk chocolate chips (plus a few to ‘test’)

1 tub of chocolate frosting 

A pot of sprinkles you completely forget to add

Method:

1. Preheat oven 180°c. Cream butter and sugar and add vanilla extract. Beat in 2 eggs.

2. Fold in the flour & throw in the chocolate chips.

3. Fill 12 cases halfway and bake for 10ish minutes until brown.

4. Let cakes cool (and sit on your hands to stop yourself eating them warm) before adding the frosting.

5. Pop the Real Icing sheets in the oven (once it’s cooled/cooling so it’s just warm) until the icing is easily removed from the sheets.

6. Add toppers to your cakes and ENJOY!

What do you think of our recipe will you be trying it out or do you have one of your own we could try? 

How lovely are the cupcake toppers? What design would you go for? 


Italian chocolate chip bread

Today we made Italian chocolate chip bread from a recipe Eva had chosen in a book ‘Bread 100 everyday recipes’ we’ve had laying around for a few years.

Italian chocolate chip bread

The recipe and method were nice and simple for the girls to do and they absolutely loved eating it too!

I shared these pictures on my Instagram and after @wendy_naptimenatterblog asked if I would share the recipe I decided to share the recipe on the blog for anyone who wants to use it since it really is so simple yet so delicious and fun to make! Especially with Cadbury’s chocolate spread…

Fancy giving it a try yourself?

You will need

Vegetable oil for brushing

225g/8oz plain flour + extra for dusting

1tbsp cocoa powder

Pinch of salt

15g/1/2oz butter plus 1/2tsp melted butter for brushing

1tbsp caster sugar

1 sachet easy blend dried yeast (We used 7g Allinsons easy blend dried yeast)

150ml/5fl oz lukewarm water

55g /2oz plain chocolate chips

Method

1. Brush a baking sheet with oil. Sift the flour, cocoa powder and salt together into a bowl. Add the butter and cut it into the dry ingredients,
then stir in the sugar and yeast.

2. Gradually add the water, stirring well with a wooden spoon until the dough begins to come together, then knead with your hands until it leaves the side of the bowl. Turn out onto a lightly floured surface and knead for about 1o minutes, or until smooth and elastic.

3. Knead the chocolate the chips into the dough, then form into a round load. Put the loaf onto the prepared baking sheet and cover. Leave ti rise in a warm place for 1-11/2 hours, or intil the dough has doubled in size. Preheat the oven to 220°C/425°F/Gas mark 7.

4. Bake the load in the preheated oven forb10 minutes,
then reduce the oven temperature to 190°C/375°F/Gas mark 5 and bake for a further 15 minutes. Transfer the loaf to a wire rack and brush the top with the melted butter. Cover with a tea towel and leave to cool.

Enjoy!